
Remember those days when you were a child, eagerly diving into a captivating story? The anticipation, the thrill of turning each page, and the longing to know what would happen next. It’s a feeling we all cherish, a connection we share through the magic of reading. And now, with a little bit of yarn and a dash of creativity, you can bring a touch of that magic back to your reading experiences with this charming, free crochet pattern for a froggy bookmark.

Image: bezgranic.magnit.ru
This adorable little amphibian, with its bright, cheerful eyes and playful pose, is more than just a bookmark. It’s a reminder of the joy of reading, a whimsical companion for your adventures through words, and a delightful project for crochet enthusiasts of all levels. So, grab your yarn, hook, and a little bit of happy, and let’s begin this delightful crafting journey together!
Starting Your Froggy Adventure: Gathering Your Supplies
Before embarking on this delightful journey, ensure you have all the necessary materials at hand. These are the tools and treasures you’ll need to bring your froggy bookmark to life:
-
Yarn: For a vibrant green frog, choose a medium weight yarn (worsted weight) in a bright, cheerful green. You can also experiment with different shades of green to create a unique froggy character. For the details, you’ll need a small amount of white yarn for the eyes and a black yarn for the pupils.
-
Hook: Choose a crochet hook that corresponds with the yarn weight. A size H/8 (5.0 mm) hook is generally recommended for worsted weight yarn.
-
Scissors: A trusty pair of scissors will be your best friend for trimming the yarn and shaping your froggy friend.
-
Stitch marker: A stitch marker, whether a piece of contrasting yarn or a dedicated marker, will help keep track of the beginning of each round and prevent lost stitches.
-
Yarn needle: A tapestry needle or a blunt-tipped needle will come in handy for weaving in the ends and adding any additional embellishments.
-
Optional: A pair of safety eyes, if you prefer a more detailed and expressive froggy face.
The Foundation of Froggy: A Simple Chain
We begin our froggy creation with the foundation chain. This chain will form the base for the entire body of our frog. Here’s how to create the chain:
-
Make a slip knot: Wrap the yarn around your finger, forming a loop. Thread the yarn through the loop, creating a knot.
-
Chain (ch): Hold the hook in your dominant hand, with the working yarn in the other hand. Wrap the yarn around the hook, then pull it through the loop on the hook. This creates a chain stitch. Repeat this process until you have 10 chain stitches.
-
Add a stitch marker: Place the stitch marker on the first chain stitch. Since the first stitch will also be the last stitch to complete the circle, marking it helps prevent confusion and ensures all stitches are captured as you work in rounds.
Shaping the Body: The Magic of Single Crochet
With the foundation chain in place, we’re ready to begin shaping the frog’s body using single crochet stitches.
-
Round 1: Work 6 single crochet (sc) stitches into the second chain stitch from the hook (skip the first chain stitch). Then, work 1 sc into each chain stitch across the row. This will result in 9 sc stitches.
-
Round 2: Work 1 sc into the first stitch, then make 1 sc into each stitch around the circle. This will result in 9 sc stitches.
-
Round 3-8: Repeat round 2 (9 sc stitches in each round) to create the body of the frog.
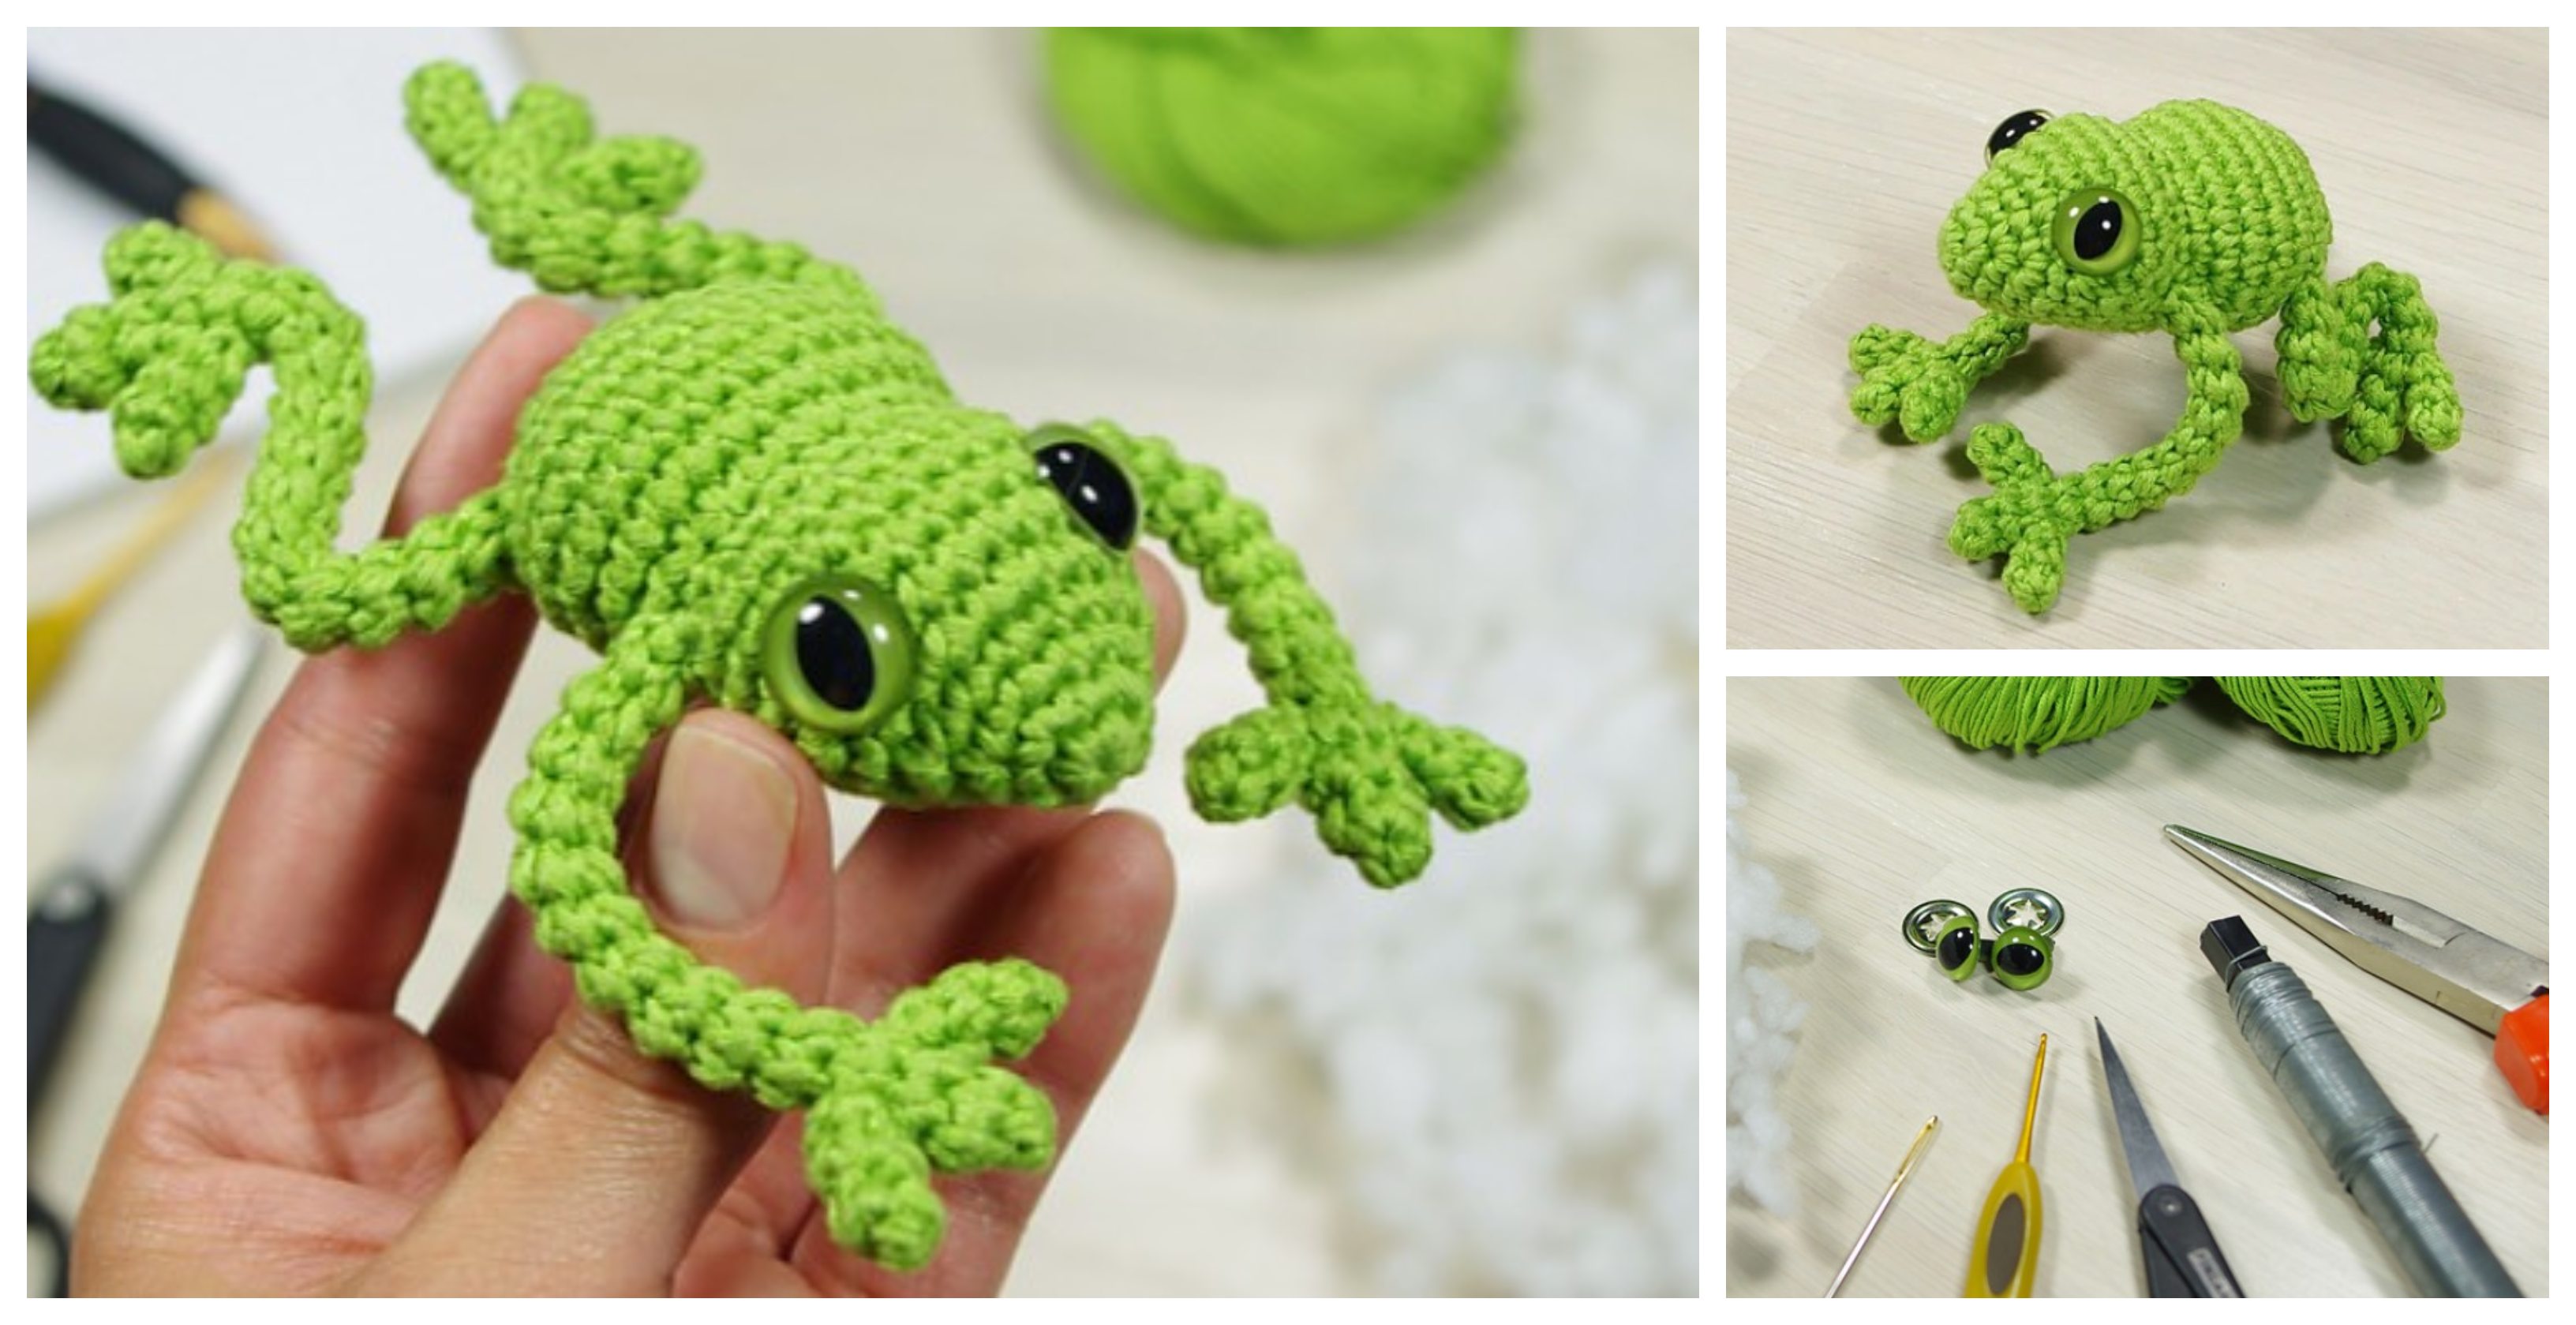
Image: thecraftchair.com
Adding the Legs: A Touch of Movement
Now that the froggy’s body is taking shape, it’s time to add those adorable legs.
-
Round 9: Work 1 sc into the first stitch, then chain 3. This chain 3 will represent the first leg. Skip the next stitch, work 1 sc into the next stitch. Now, chain 3 for the second leg. Skip the next stitch, work 1 sc into the next stitch. Repeat this chain 3, skip 1 stitch, 1 sc sequence around the rest of the circle. You will have a total of 3 chains, followed by a single crochet stitch for each round, for 9 sc stitches and 3 chains in total.
-
Round 10-13: Repeat round 9, working 1 sc into the first stitch, followed by chains 3 and 1 sc stitches, alternating around the circle. This will continue to shape the legs.
Crafting the Top: The Frog’s Head
The top of the frog’s body will now morph into its head.
-
Round 14: Work 1 sc into the first stitch, then chain 3. Now, instead of skipping a stitch, work 2 sc into the next stitch to create a slight bump that will form the frog’s head. Work 1 sc into the next stitch. Continue the pattern of chain 3, 2 sc into the next stitch, and 1 sc into the next stitch, alternating around the circle. This pattern will result in 6 sc stitches and 3 chains in total.
-
Round 15: Work 1 sc into the first stitch, then chain 3, 2 sc into the next stitch, and then 1 sc into the next stitch. Continue this chain 3, 2 sc, and 1 sc pattern around the circle.
-
Round 16-18: Repeat round 15. Each round will have 6 sc stitches and 3 chains in total.
Adding the Eyes: A Touch of Personality
Time to bring your froggy to life! With a little bit of white and black yarn, we’ll create those bright, cheerful eyes.
-
Create the eye circles: Using white yarn, work 6 sc stitches into a magic ring (an alternative to a slip knot). Secure with a slip stitch and fasten off. Repeat this to create the second eye.
-
Embroider the pupils: Using black yarn, embroider a tiny circle inside each white eye circle.
-
Attach the eyes: With yarn needle or a piece of yarn, sew the white eye circles onto the frog’s head.
Finishing Touch: Your Froggy Bookmark is Ready!
Your delightful frog bookmark is almost complete! We just need to finish off with a little bit of care.
-
Fasten off: Carefully fasten off the yarn, leaving a small tail for weaving in later.
-
Weave in ends: Using your yarn needle, weave in all the loose ends to create a tidy, professional finish.
-
Optional: For a touch of fun, you can add a small bead or a button to the frog’s chest, for an adorable embellishment.
Free Crochet Pattern For Frog Bookmark
Readying Your Froggy: Putting It to Use
And there you have it! Your own charming crochet frog bookmark, ready to join your next reading adventure. It’s a perfect, personalized gift for bookworms young and old, adding a vibrant splash of color and whimsy to any bookshelf.
With its simple design and easy-to-follow instructions, this froggy bookmark serves as a wonderful introduction to crochet. It’s a perfect project for beginners keen to explore the world of yarn and hook, while also creating a delightful and useful treasure. Dive into the world of crocheting and create a froggy bookmark that will make every reading experience a little bit more joyful!


